In the age of smart technology and connected devices, your Tesla Wall Charger is no exception.
Connecting your Tesla Wall Charger to your home Wi-Fi network allows you to unlock a myriad of benefits and functionalities. Whether you want to remotely monitor your charging sessions, set up convenient charging schedules, or ensure your charger’s firmware is up-to-date, a Wi-Fi connection is the key.
In this comprehensive guide, we will take you through each step to seamlessly connect your Tesla Wall Charger to your Wi-Fi network, empowering you with greater control and convenience over your electric vehicle’s charging experience.

Connecting Tesla Wall Charger to Wi-Fi (Steps)
You can do this by following a few simple steps-
Preparing for the Connection
Gathering necessary equipment and information
Before you embark on the setup journey, make sure you have the following:
- Tesla Wall Charger unit: Ensure it is correctly installed, either wall-mounted or on a pedestal, and that all physical connections are secure.
- Wi-Fi network credentials: You’ll need the SSID (network name) and password for your home Wi-Fi network.
- Quick Start Guide: The quick start guide provided with your Tesla Wall Connector will be needed for this procedure. So, find that as well.
Ensuring the Tesla Wall Charger is properly installed
Safety and proper installation of the Tesla Wall Charger are paramount. Take the following steps to ensure everything is in order:
Wall mounting or pedestal placement: Confirm that the charger is securely installed according to the manufacturer’s instructions. This may involve wall mounting or placing it on a designated pedestal.
Electrical connections: Verify all electrical connections and wiring are correctly set up, adhering to the guidelines provided in the user manual. If needed, consult with a qualified electrician to guarantee safety.
Safety precautions: Familiarize yourself with the safety precautions outlined in the user manual. Understanding safety measures is crucial when dealing with electrical devices.
Installing and Setting up the Tesla Mobile App
The Tesla app serves as the control center for your Tesla Wall Charger. Follow these steps to ensure you’re set up correctly:
Download and install the Tesla app: Visit your device’s app store and download the Tesla app. After installation, launch the app.
Create a Tesla account (if not already done): If you don’t have a Tesla account, you can create one within the app. Provide the necessary information to set up your account.
Log in to the app: Use your Tesla account credentials to log in to the app. Make sure you remember your username and password.
Verify and enable app permissions: Ensure that the Tesla app has the required permissions, such as location access, to enable all the features seamlessly.
Power up the Wall Connector
If the wall connector is not already powered, use the switch or circuit breaker controlling the power to the wall connector for powering it on.
Once you power the wall connector, the LED indicator on the wall connector will go from yellow to green light. This means that the Wall connector is ready to do its job.
Performing the Home Wi-Fi to Wall Charger Connection
With the Tesla app and wall connector ready, it’s time to connect your Tesla Wall Charger to Wi-Fi:
1. Turn on the Wi-Fi on the Wall Charger
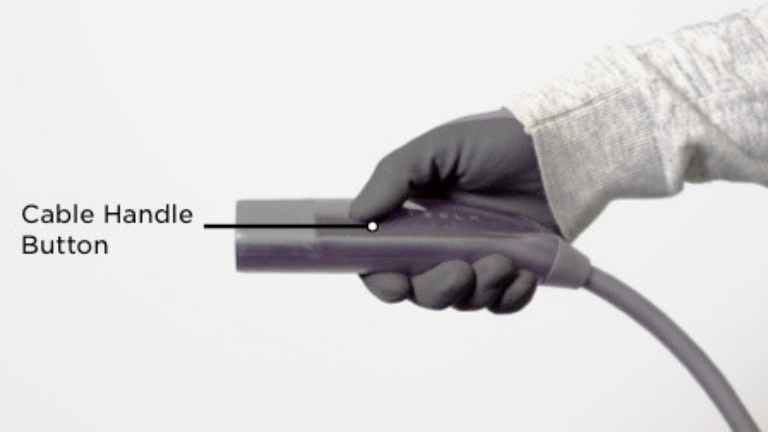
Press and hold the wall connector cable handle button for 10 seconds to make the wall charger broadcast the Wi-Fi signal.

2. Ensure WiFi Broadcast
Once the wall connector starts broadcasting the Wi-Fi signal, it will show a green LED on the indicator. From the moment it shows the green light, the charger will broadcast WiFi for 15 minutes for you to do the job.
If you fail to do the job within that period, you will need to start the process all over again. Worry not, the process should not take more than a couple of minutes if done properly.
3. Connect to Wall Connectors WiFi
Take your phone and turn on the WiFi. Disconnect from your home network if it is already connected to that.
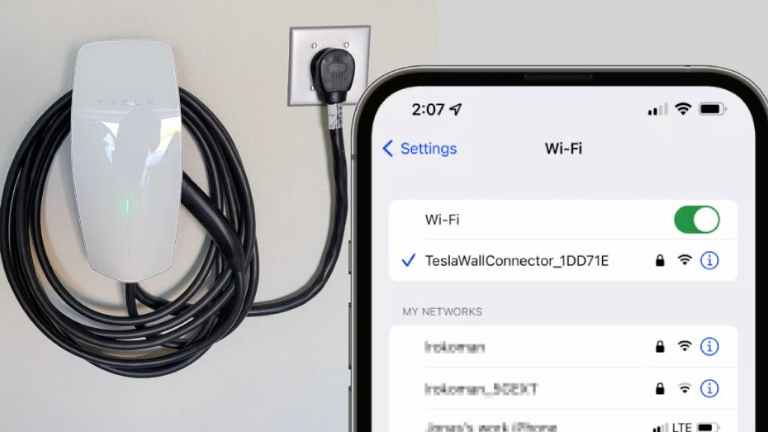
You should see a WiFI SSID named TeslaWallConnector_XXXXXX on your phone. You will need to connect to that.
Once you click on that, the phone will ask you to input the password written on your Wall Connector Quick Start Guide.
If for any reason the Quick Start Guide is unavailable, you will be able to retrieve the password using the Tesla diagnostic tool where you will need the part number and serial number.
Once you input the password written next to WPA2: on the Quick Start guide, the phone should connect to your Wall connector’s wifi network.
4. Setup the Tesla Wall Connector WiFi
Once your phone is connected to the Wall Connector, you can enter http://192.168.92.1 on any browser to get access to the setup page.
Sometimes, the IP address might not work. In that case, disconnecting and reconnecting to the WiFi should solve the issue.
Once you open the setup page on your browser using the IP address, you should see an option called Wi-Fi in it. Select that option. After that, select your home WiFi network and input the password of your home WiFi, then click on the blue arrow button.
It should take a moment to connect the wall charger to your home Wi-Fi network and complete the process.
Verifying the Connection
After performing the above processes, your Tesla Wall Connector should be good to go. To confirm the system is working properly, you can go to http://192.168.92.1/ and scroll down to Software.
Select Software and click on Check for Update. It will check whether any new update is available for the charger and if available you can download and install that.
Tips for a Smooth Connection
To make the most of your Tesla Wall Charger’s Wi-Fi connection, consider these additional tips:
Placement of the Tesla Wall Charger for optimal Wi-Fi signal: Position the charger where it can maintain a strong Wi-Fi signal. Avoid obstacles that might interfere with signal strength.
Maintaining a stable internet connection: Ensure your home internet connection is reliable. A stable connection is crucial to prevent interruptions during charging and monitoring.
Troubleshooting common issues proactively: Take the time to familiarize yourself with common issues and their solutions. This knowledge can help you address any problems quickly, ensuring uninterrupted EV charging.
Conclusion
Connecting your Tesla Wall Charger to Wi-Fi is a significant step toward unlocking its full potential and enjoying a seamless EV charging experience.
The convenience of remote monitoring, charging scheduling, and over-the-air updates is at your fingertips. As electric vehicle technology continues to advance, staying connected becomes increasingly essential, and Tesla makes it both straightforward and efficient.
By following this exhaustive step-by-step guide, you can confidently navigate the setup process and maximize the benefits of your Wi-Fi-connected Tesla Wall Charger.
Embrace the future of sustainable transportation with ease and join the growing community of EV enthusiasts enjoying the advantages of smart, connected charging.

